Adding custom fonts to Elementor is pretty straightforward. Here’s a step-by-step guide to help you:
Step 1: Add a Custom Font to Elementor
- Go to WP Admin.
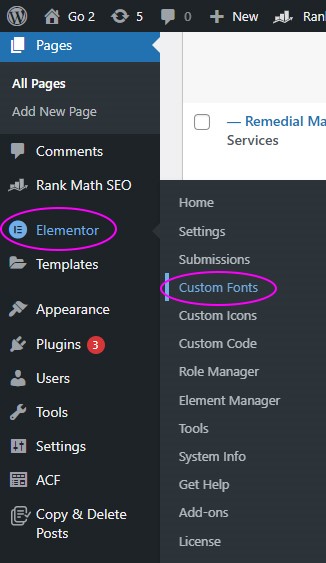
2. Navigate to Elementor>Custom Fonts.

3. Click Add New.
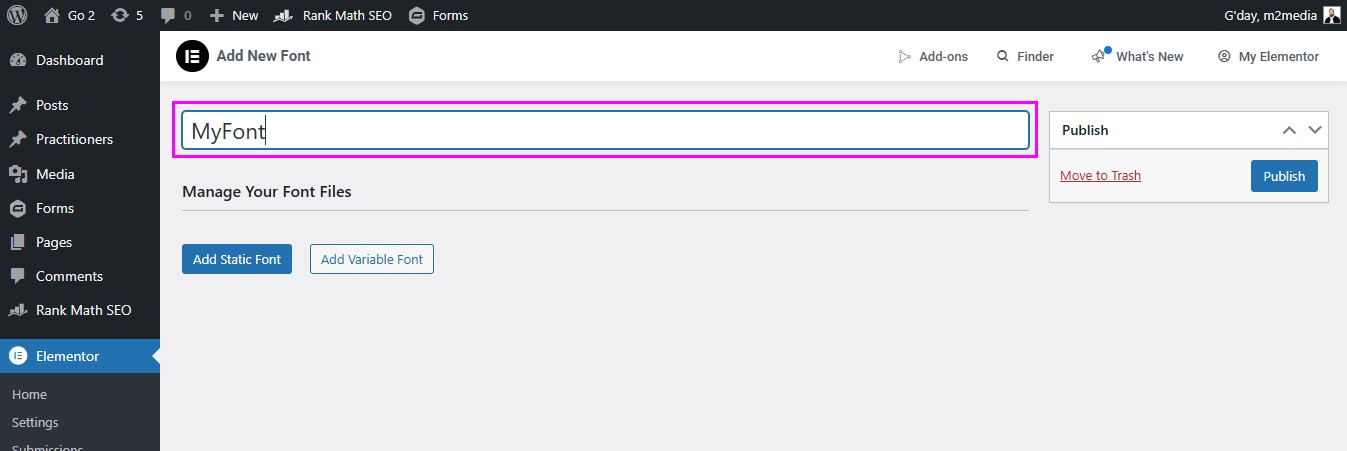
4. Name your font.
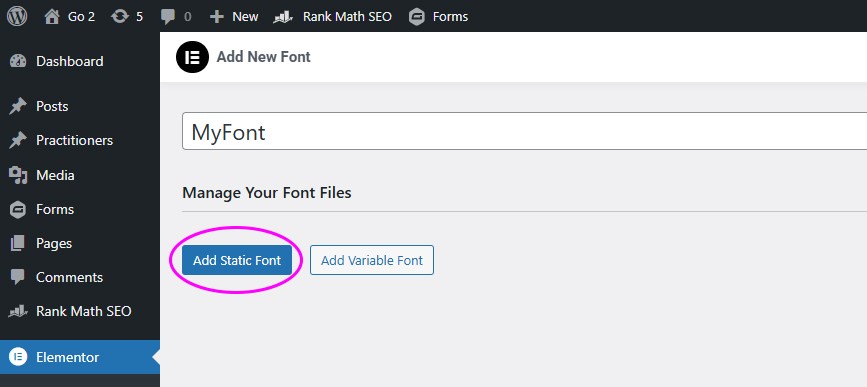
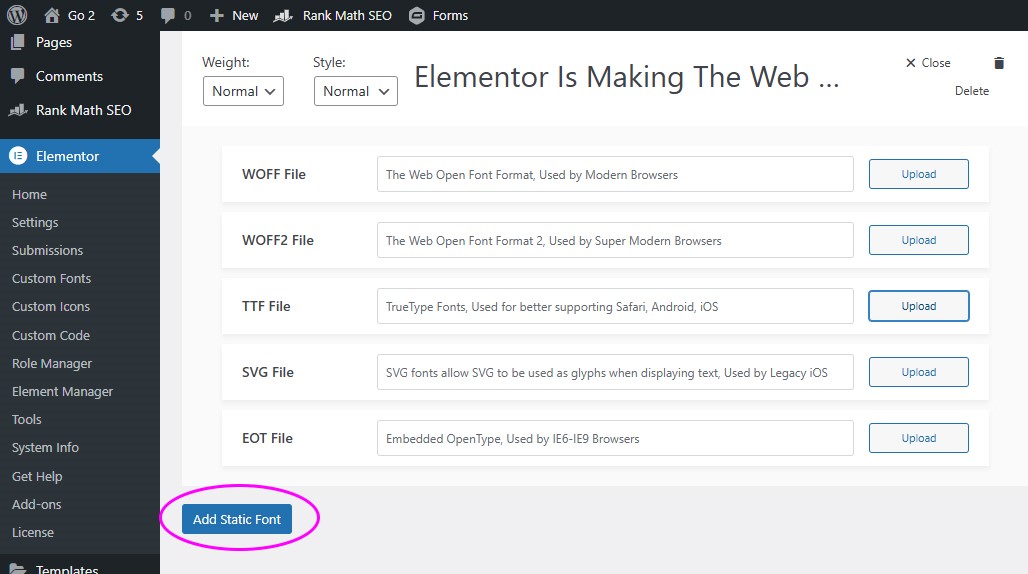
5. Click Add Static Font.
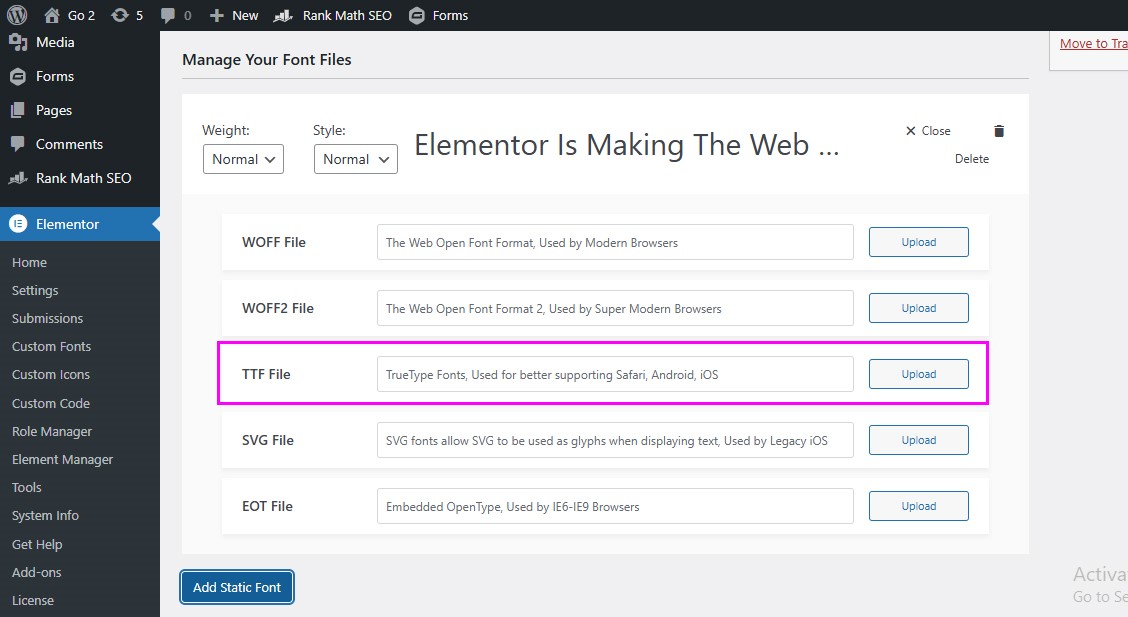
6. Choose the font type you want to install. See below the font types supported by Elementor. In this example, we’ll use a ttf file.
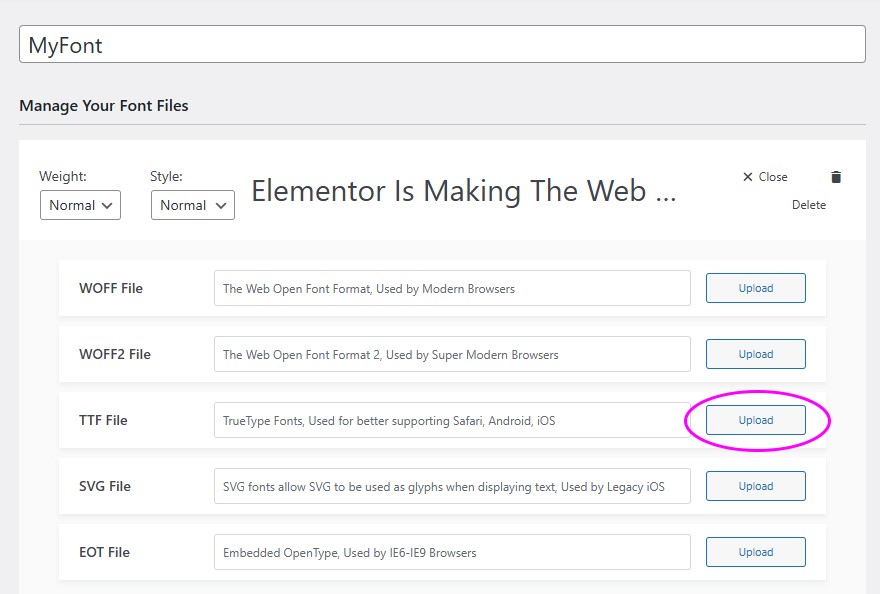
7. Click Upload
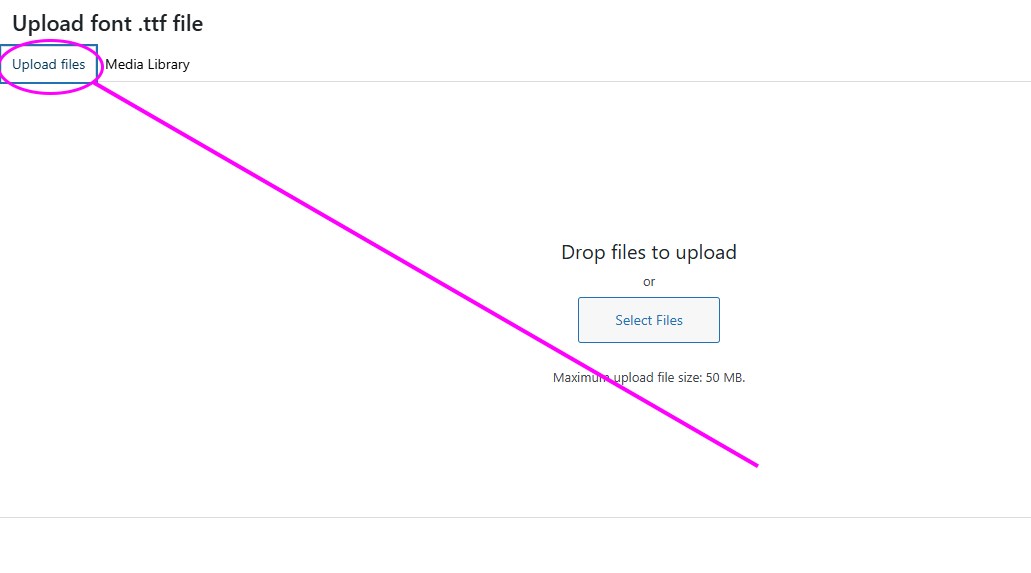
8. Click the Upload files.
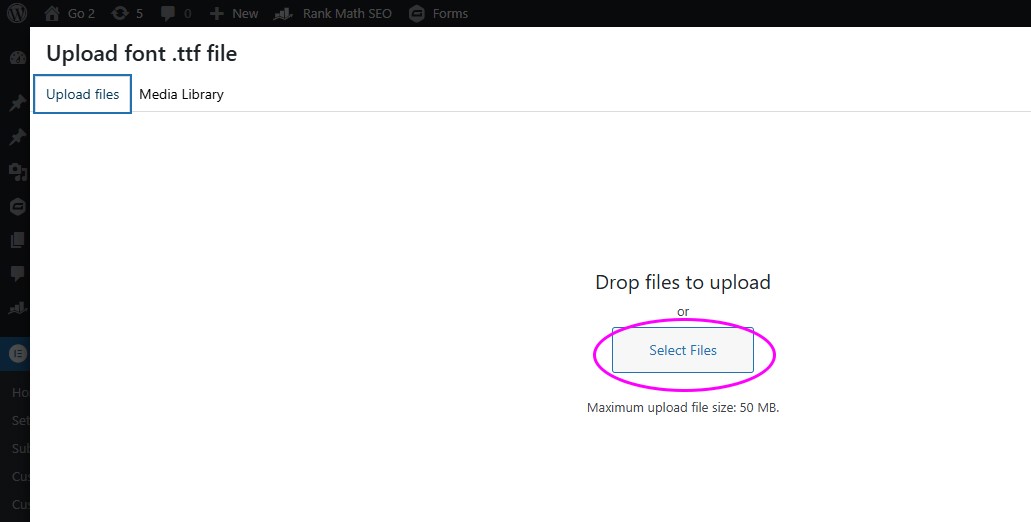
9. Click Select Files.
10. Navigate to your font files and add to your Media Library.
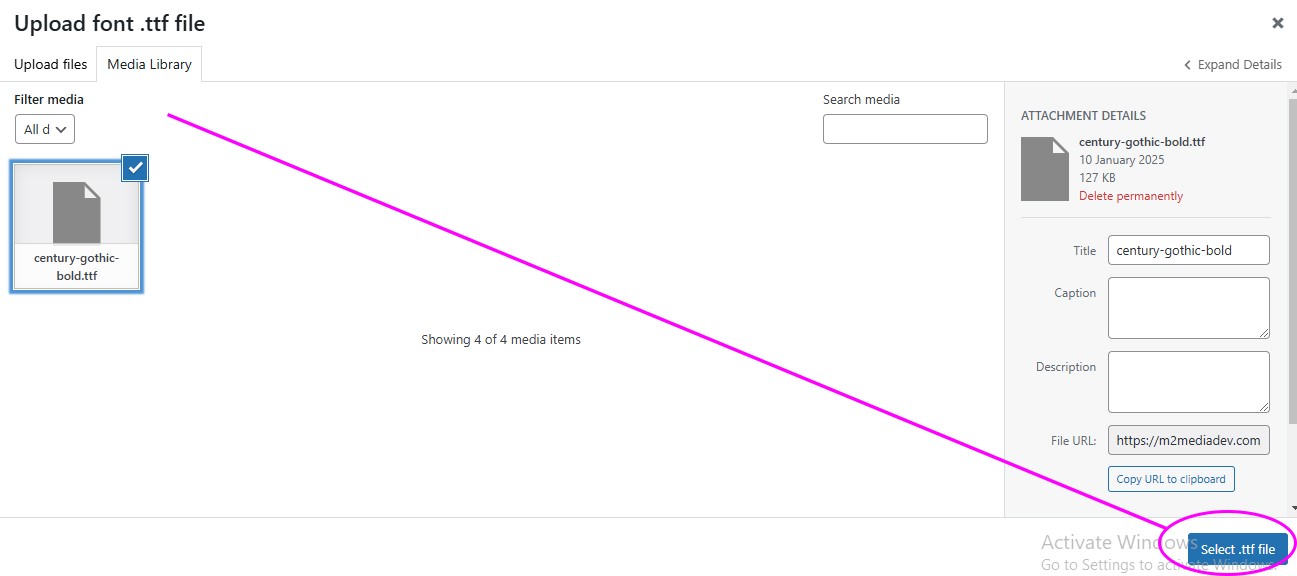
11. Click Select File.
12. Click Add Static Font.
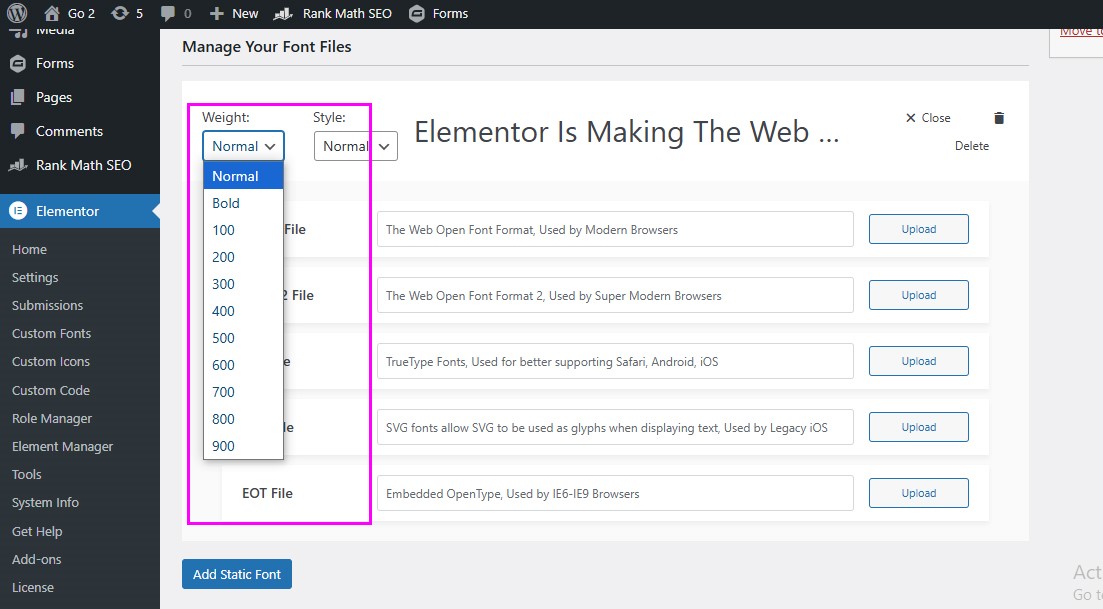
13. Use the dropdown menus to select a Weight and or Style for the font.
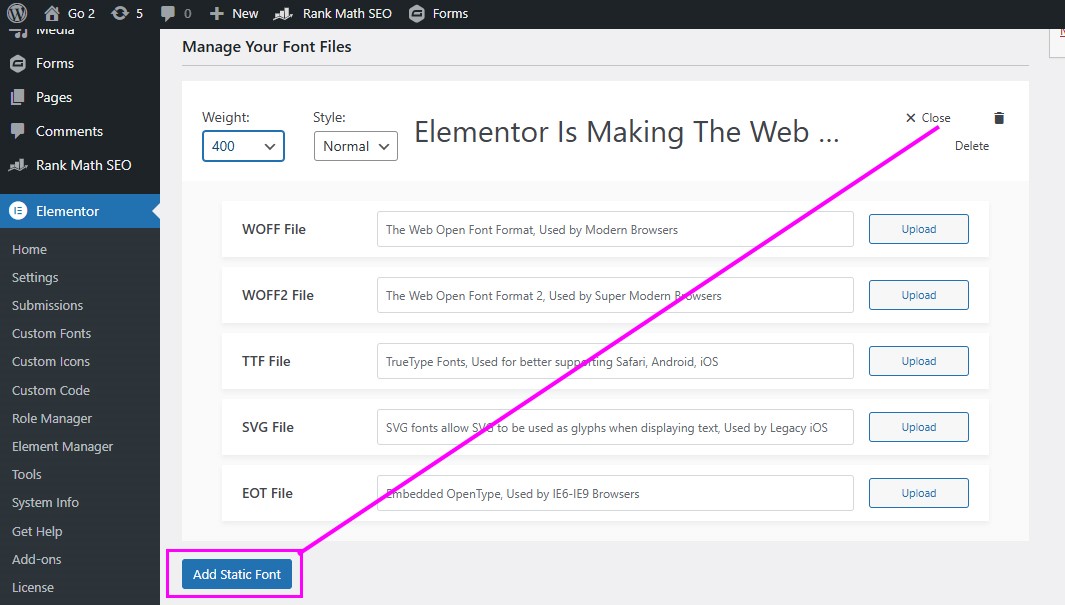
14. (Optional) If you want to add another version of the font with a different Weight and/or Style, click Add Static Font.
15. Repeat until you’ve added all the fonts you need.
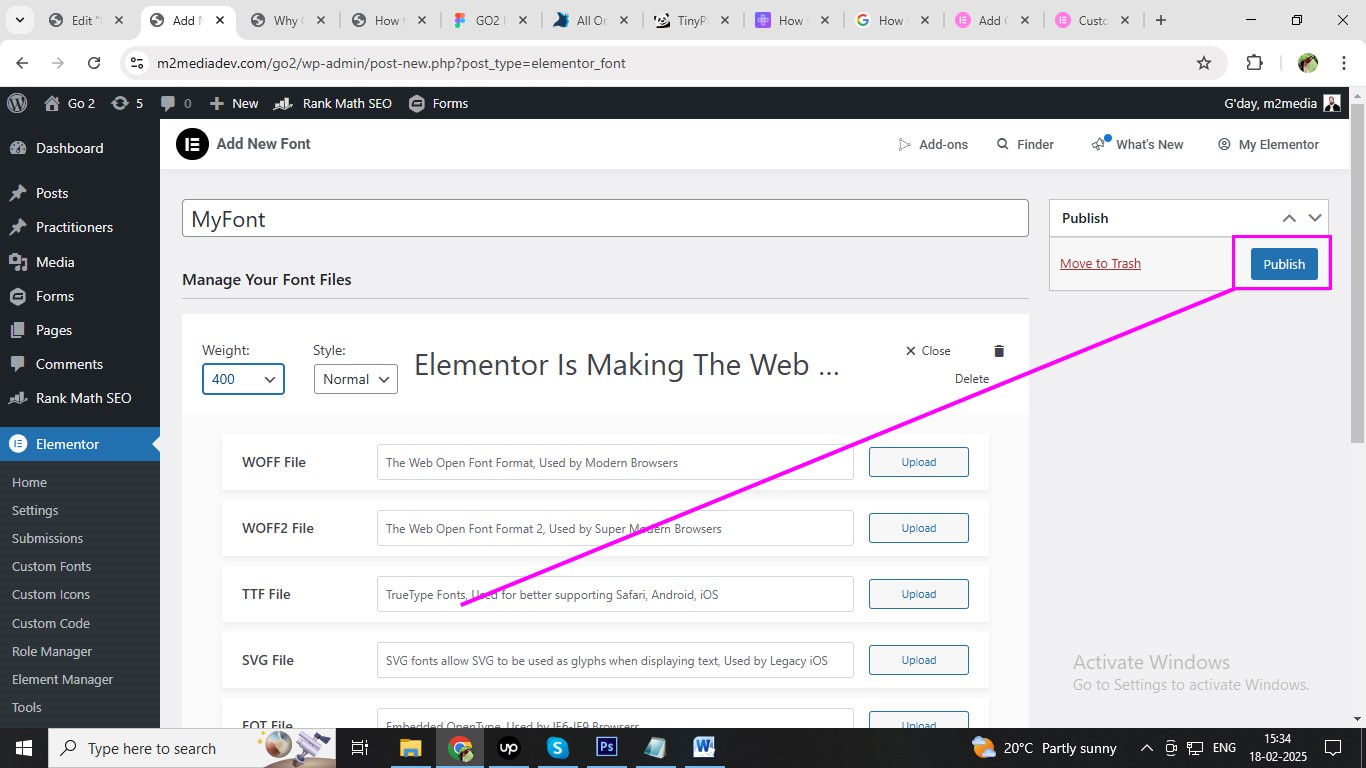
16. Click Publish.
Read :
Session and Cookies in PHP: When to Use What?
AJAX with PHP and MySQL: User Registration & Search
Also Visit :