To create an ftp account in EditPlus follow the steps listed below.
- Go to and open File > FTP > FTP Setting..
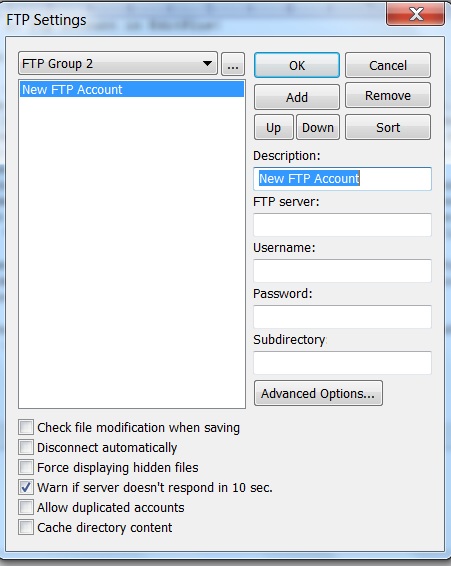
- In the opened window (as shown below) click Add button to add a new account.

- Enter a Description for your new ftp account which by default would show “New FTP Account” or similar.
- Fill in the FTP Server field with appropriate ftp server name. For example ftp.devarticles.in or devarticles.in. Check you ftp details for exact server name/username/password which your hosting company might have provide you with.
- Enter your ftp password in Password field.
- Enter the path to your website’s sub directory into Subdirectory field. Subdirectory path may vary for different users. For example it could be /home/webroot/sitename or /public_html or c:/sites/mysite/wwwroot. It is quite useful when you connect to your ftp account. If you have got entered this path into Subdirectory field it would open your website’s root folder directly whenever you connect to your server. Very useful for users with slow internet conenctions.
The basic ftp account set up has now been done. If you want to configure your ftp account with some additional settings like different port number other than default port number (which is 21) or need to use sftp account (secure ftp) you can use Advanced Options button on the FTP Setting.. screen (shown above).
This is all about setting up a FTP account in EditPlus. You can explore more advanced FTP options like multiple file uploads by navigating through File > FTP path in your EditPlus menu. Thank you!