React, also known as React.js or ReactJS, is a free and open-source front-end JavaScript library for building user interfaces based on UI components. ReactJS is maintained by Meta (formerly Facebook) and a community of individual developers and companies.
Some of the popular websites built using React are Facebook, BBC, Netflix, Salesforce, Asana and Dropbox.
While it can be a breeze developing an App in React, it may not be straight-forward to deploy a React app. If you are deploying it for first time, it may involve some learning curve. In this tutorial I am going to share my experience of developing a React app on Ubuntu 22.04LTS hosted on Amazon EC2 server instance.
Hosting on Amazon AWS
AWS EC2 is one of many popular options to host a React app. In this article we’ll see how to deploy a React app with ngnix on a Ubuntu 22.04 LTS hosted as an AWS EC2 Instance.
(I assume that you have a basic knowledge of AWS cloud system and React. I also assume that you already have got a domain and it is pointed to your server.)
$ ssh <username>@<server-ip> -i <key-name>
Part 1 – Install nginx
sudo apt update
sudo apt install nginx -y
Adjust firewall
Before testing Nginx, the firewall software needs to be configured to allow access to nginx service. Nginx registers itself as a service with ufw upon installation, making it straightforward to allow Nginx access.
sudo ufw app list
You should get a listing of the application profiles:
Output
Available applications:
  Nginx Full
  Nginx HTTP
  Nginx HTTPS
  OpenSSH
As demonstrated by the output, there are three profiles available for Nginx:
- Nginx Full: This profile opens both port 80 (normal, unencrypted web traffic) and port 443 (TLS/SSL encrypted traffic)
- Nginx HTTP: This profile opens only port 80 (normal, unencrypted web traffic)
- Nginx HTTPS: This profile opens only port 443 (TLS/SSL encrypted traffic)
It is recommended that you enable the most restrictive profile that will still allow the traffic you’ve configured. Right now, we will only need to allow traffic on port 80.
You can enable this by typing:
sudo ufw allow 'Nginx HTTP'
You can verify the change by typing:
sudo ufw status
The output will indicated which HTTP traffic is allowed:
Output
Status: active

To                         Action      From
--                         ------      ----
OpenSSH                    ALLOW       Anywhere
Nginx HTTP                 ALLOW       Anywhere
OpenSSH (v6)               ALLOW       Anywhere (v6)
Nginx HTTP (v6)            ALLOW       Anywhere (v6)
If sudo ufw status return Status: inactive then run:
sudo ufw enable
Check the status of nginx service:
sudo systemctl status nginx
You should see output such as this:
nginx.service - A high performance web server and a reverse proxy server
     Loaded: loaded (/lib/systemd/system/nginx.service; enabled; vendor preset: enabled)
     Active: active (running) since Wed 2023-03-29 10:18:03 UTC; 46min ago
       Docs: man:nginx(8)
    Process: 2434 ExecStartPre=/usr/sbin/nginx -t -q -g daemon on; master_process on; (code=exited, status=0/SUCCESS)
    Process: 2435 ExecStart=/usr/sbin/nginx -g daemon on; master_process on; (code=exited, status=0/SUCCESS)
   Main PID: 2531 (nginx)
      Tasks: 3 (limit: 4686)
     Memory: 5.4M
        CPU: 28ms
     CGroup: /system.slice/nginx.service
             ├─2531 "nginx: master process /usr/sbin/nginx -g daemon on; master_process on;"
             ├─2533 "nginx: worker process" "" "" "" "" "" "" "" "" "" "" "" "" "" "" "" "" "" "" "" "" "" "" "" "" "" "" ""
             └─2534 "nginx: worker process" "" "" "" "" "" "" "" "" "" "" "" "" "" "" "" "" "" "" "" "" "" "" "" "" "" "" ""
Open in the browser http://your_public_ip/

Part 2 – Install Other dependencies
Nodejs (optional)
Although Nodejs is not required to run basic React applications, it is essential if you are using the popular JSX syntax in your React app. Nodejs makes developers life easier by providing access to Javascript ecosystem a React app uses. Nodejs is required if you want to use a node.js-based build tool like browserify or webpack to build nity production bundles.
Install Nodejs
In order to install Nodejs we need curl to get Nodejs downloaded to our server. On a EC2 instance curl comes installed by default. So if curl --version does not show you result on your server, install it by running:
sudo apt-get install curl
Next, install Nodejs
curl -sL https://deb.nodesource.com/setup_18.x | sudo -E bash -
Then:
sudo apt-get install -y nodejs
Test if it worked
node -v
npm --v
Install
On Ubuntu you’ll need to install the build-essential package:
sudo apt-get install build-essential
Install Yarn (optional)
Since I, personally like to use Yarn for package management in my React.js apps I would install Yarn, using npm of course.
sudo npm install yarn -g
Create project
Let’s create a react app using create-react-app. If create-react-app is not installed it should ask you to install it so press y when asked to do so.
npx create-react-app react-tutorial
Now go into directory and build and run, using yarn
yarn install
yarn run build
yarn start
After you enter the yarn start, you’ll be able to see the react server running and the relevant ports in the shell.
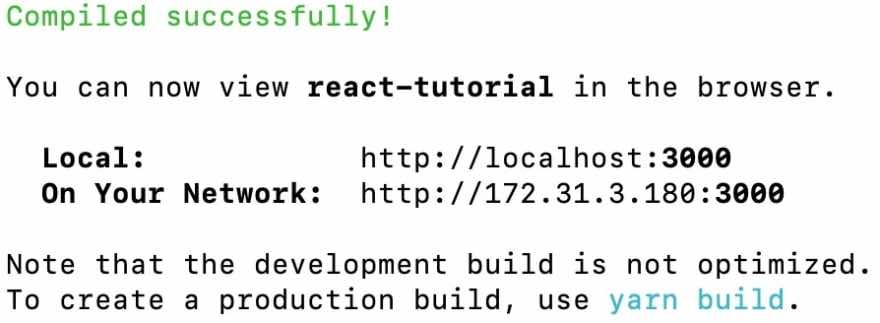
Try to access the react app at public IP for your server. For example http://172.31.3.180:3000
Note: 3000 port should be opened in the security group of your EC2 instance, as shown below. You can add an inbound rule to the security group attached to your EC2 instance.
So now, your server’s public IP with 3000 port should display something like this:
The React app is now running but there is a problem. If as you exit the ssh console, the React App will stop. In order to fix this, and keep app running even if we close or exit the ssh console, we need a process manager to keep app running all the time, unless we manually stop it.
Install PM2
PM2 is a daemon process manager that will help you manage and keep your application online 24/7. Let’s install it.
sudo yarn global add pm2
or
sudo npm install pm2@latest -g
After installing pm2 you may want to test some of its basic commands:
pm2 status
pm2 list
pm2 restart
pm2 stop
pm2 start
pm2 delete
To run our app run the following while being at the app folder, i.e. react-tutorial
pm2 start yarn --name "React Tutorial" -- start
Once App is started, running pm2 list would yield

Configuring Nginx to Deploy React App
Since we have access to our app at port 3000 we would like it to show it at the default port 80 or our Nginx web server. That also means that it has to show at the very root of our our domain since we already have pointed our domain to this server’s public IP address.
In the next step of this tutorial we are going to see how we can use Nginx as a reverse proxy and divert traffic to port 80 i.e. the default landing page of our domain or public IP.
Create a new site config in /etc/nginx/sites-available
cd /etc/nginx/sites-available
sudo nano react-tutorial
The last command will open a text file to be edited. Paste the following code into it while replacing xxx.xx.. with your IP address, add domain name with space, use any one of two or both.
server {
    listen 80;
    listen [::]:80;

    server_name xxx.xxx.xxx.xxx yourdomain.com;
    access_log /var/log/nginx/reat-tutorial.com.access.log;
    error_log /var/log/nginx/reat-tutorial.com.error.log;
    location / {
            proxy_pass http://127.0.0.1:3000;
            client_max_body_size 50m;
            client_body_buffer_size 16k;
            proxy_http_version 1.1;
            proxy_set_header Upgrade $http_upgrade;
            proxy_set_header Connection 'upgrade';
            proxy_set_header Host $host;
            proxy_cache_bypass $http_upgrade;
    }
}
Save and exit the file with Ctl+x -> Y.
Next, we need to activate this new site by creating a symlink to new site configuration
sudo ln -s /etc/nginx/sites-available/react-tutorial /etc/nginx/sites-enabled/
Make sure that your nginx configuration syntax is error free
sudo nginx -t
Restart Nginx
sudo systemctl restart nginx
You may want to restart your app also:
pm2 restart "React Tutorial"
If everything went well you should see your app running at the root domain or your Amazon EC2 instance’s public IP address.
Conclusion
In this tutorial for “Deploying ReactJS App on Ubuntu 20.04 LTS on Amazon EC2 instance” we have learned to:
- Install and configure Nginx on Ubuntu 22.04LTS on Amazon ec2 instance
- Configure firewall to handle incoming requests to Nginx
- Install Nodejs
- Install repository manager Yarn
- Create and Deploy our first React app
- Install PM2 process manager
- Configure Nginx to serve our React app from root